我想在网站上显示自己当前的心情状态,就像微信的状态一样。
但是WordPress是不自带这个功能的,我就自己搞了一个。
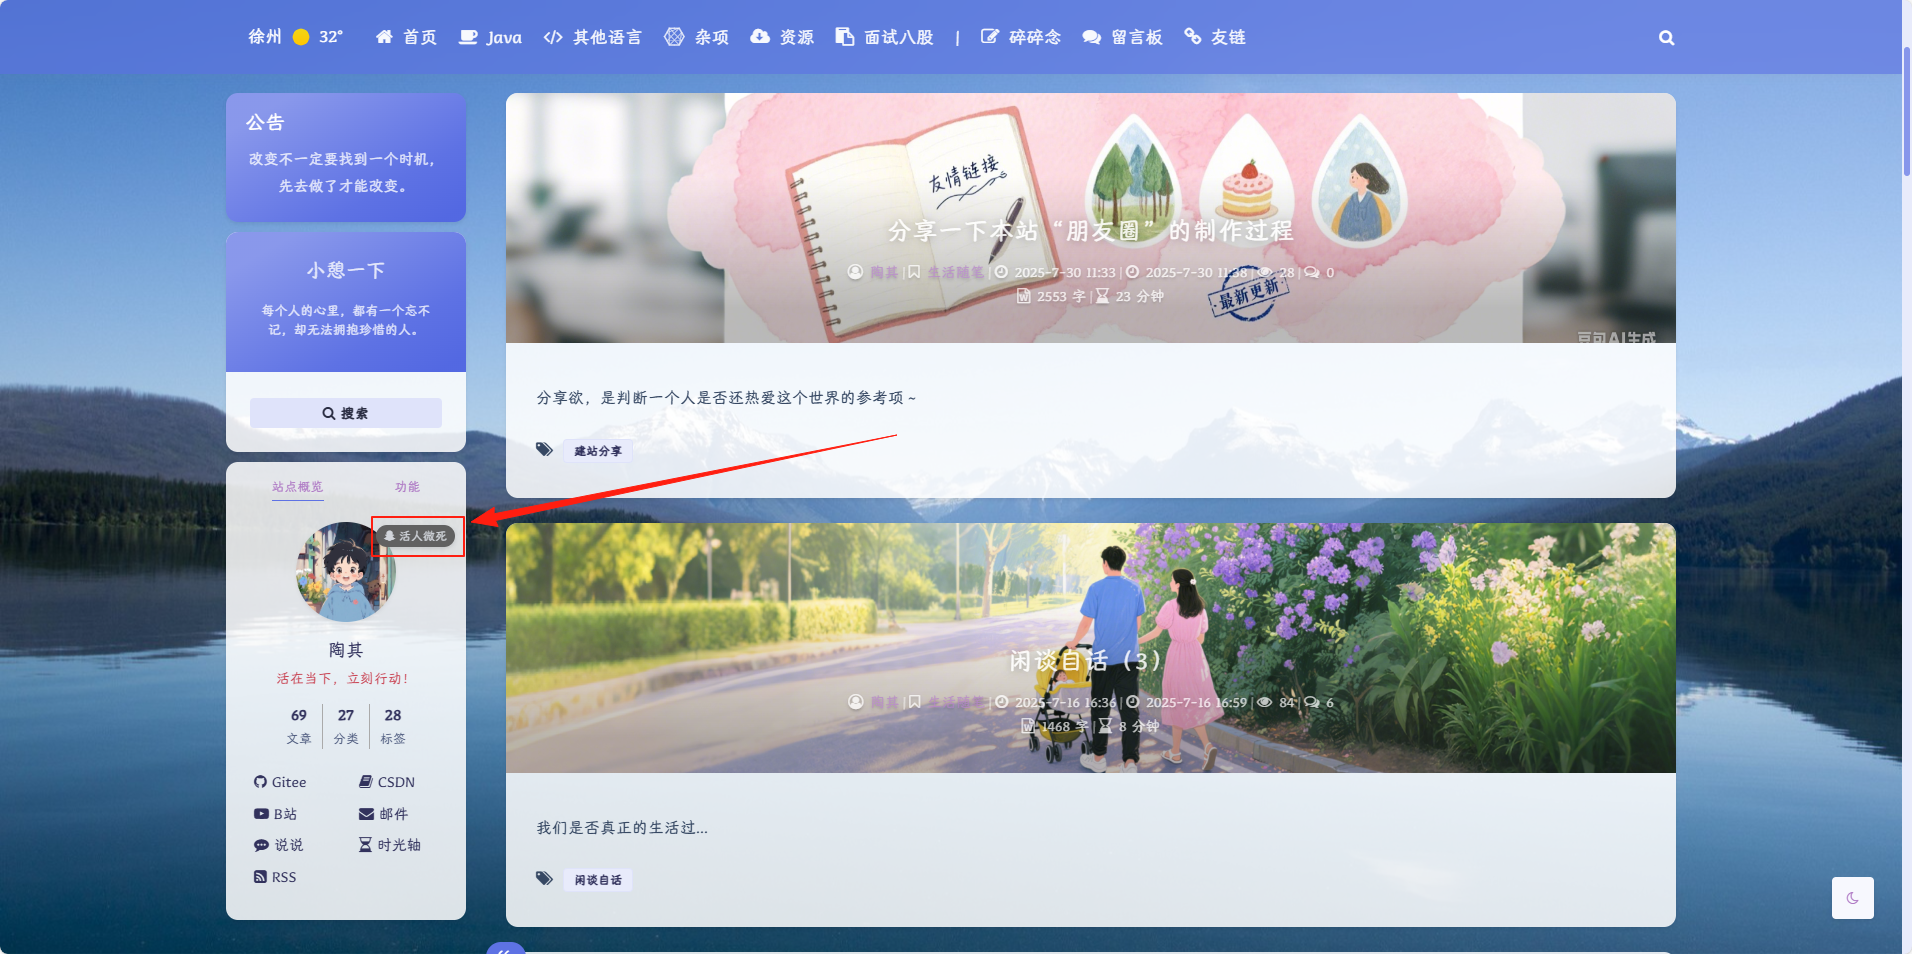
效果:
一、配置清单
下面是我的配置清单,我只能保证最终效果在本配置下生效。
- 博客平台: WordPress 6.8.0
- 主题模板: Argon 1.3.5
以下是配置步骤:
二、编辑functions.php文件
打开博客后台 > 外观 > 主题文件编辑器 > functions.php,拉到最后,新增如下配置,并更新文件:
// ------------------------------------------------ 状态start ------------------------------------------------
// 添加状态设置菜单
function custom_status_menu() {
add_menu_page(
'状态设置',
'状态',
'edit_posts',
'custom-status-settings',
'custom_status_settings_page',
'dashicons-smiley',
6
);
}
add_action('admin_menu', 'custom_status_menu');
// 注册设置(添加输入框验证逻辑)
function custom_status_register_settings() {
register_setting(
'custom-status-group',
'current_status',
array(
'sanitize_callback' => 'sanitize_custom_status' // 新增:处理状态值逻辑
)
);
register_setting('custom-status-group', 'status_text_color');
register_setting('custom-status-group', 'status_bg_color');
}
add_action('admin_init', 'custom_status_register_settings');
// 新增:处理状态值(优先使用输入框内容)
function sanitize_custom_status($input) {
// 获取输入框的值
$custom_input = isset($_POST['custom_status_input']) ? sanitize_text_field($_POST['custom_status_input']) : '';
// 如果输入框有内容,返回输入框值;否则返回下拉框值
return !empty($custom_input) ? $custom_input : $input;
}
// 设置页面内容(新增输入框)
function custom_status_settings_page() {
$statuses = array(
'<i class="fa fa-meh-o"></i> emo', // 情绪低落:中性表情(存在)
'<i class="fa fa-bed"></i> 疲惫', // 疲惫:床(关联休息,存在)
'<i class="fa fa-cloud"></i> 等天晴', // 等天晴:云朵(存在)
'<i class="fa fa-snapchat-ghost"></i> 活人微死', // 消极状态:幽灵(存在)
'<i class="fa fa-smile-o"></i> 美滋滋', // 开心:微笑(存在)
'<i class="fa fa-bolt"></i> 裂开', // 崩溃:闪电(存在)
'<i class="fa fa-meh-o"></i> 发呆', // 茫然:中性表情(存在)
'<i class="fa fa-lightbulb-o"></i> 胡思乱想', // 思考:灯泡(存在)
'<i class="fa fa-hand-peace-o"></i> 元气满满', // 活力:比耶(存在)
'<i class="fa fa-android"></i> bot', // 机器人:安卓图标(存在)
'<i class="fa fa-briefcase"></i> 搬砖ing', // 工作:公文包(存在)
'<i class="fa fa-book"></i> 沉迷学习', // 学习:书本(存在)
'<i class="fa fa-spinner"></i> 忙', // 忙碌:旋转加载(存在)
'<i class="fa fa-coffee"></i> 摸鱼ing', // 摸鱼:咖啡(存在)
'<i class="fa fa-child"></i> 带娃', // 带娃:小孩图标(存在)
'<i class="fa fa-shield"></i> 拯救世界', // 守护:盾牌(存在)
'<i class="fa fa-home"></i> 宅', // 宅家:家(存在)
'<i class="fa fa-bed"></i> 想睡觉', // 困倦:床(存在)
'<i class="fa fa-moon-o"></i> 困死', // 极度困倦:月亮(存在)
'<i class="fa fa-music"></i> 听歌ing', // 听歌:音乐符号(存在)
'<i class="fa fa-rocket"></i> 逃离地球' // 逃离:火箭(存在)
);
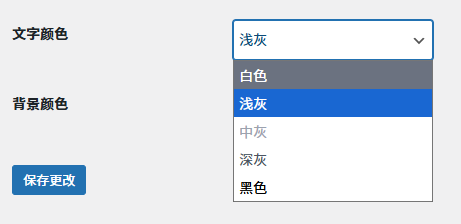
$color_presets = array(
'text' => array(
'#FFFFFF' => '白色',
'#D1D5DB' => '浅灰',
'#9CA3AF' => '中灰',
'#4B5563' => '深灰',
'#000000' => '黑色',
),
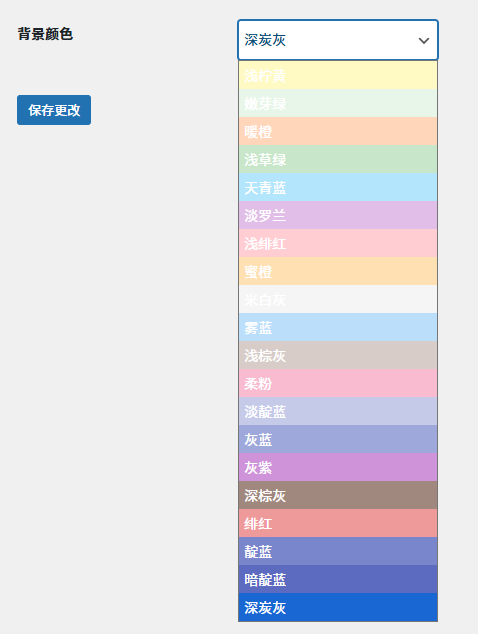
'bg' => array(
'#FFF9C4' => '浅柠黄', '#E8F5E9' => '嫩芽绿',
'#FFD6BA' => '暖橙', '#C8E6C9' => '浅草绿', '#B3E5FC' => '天青蓝', '#E1BEE7' => '淡罗兰', '#FFCDD2' => '浅绯红',
'#FFE0B2' => '蜜橙', '#F5F5F5' => '米白灰', '#BBDEFB' => '雾蓝', '#D7CCC8' => '浅棕灰', '#F8BBD0' => '柔粉', '#C5CAE9' => '淡靛蓝',
'#9FA8DA' => '灰蓝', '#CE93D8' => '灰紫', '#A1887F' => '深棕灰', '#EF9A9A' => '绯红', '#7986CB' => '靛蓝', '#5C6BC0' => '暗靛蓝', '#616161' => '深炭灰',
)
);
?>
<div class="wrap">
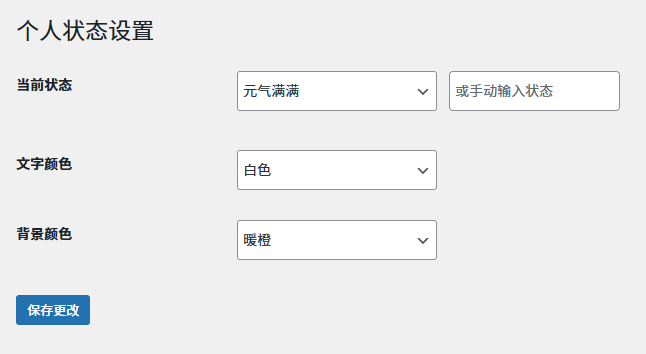
<h1>个人状态设置</h1>
<form method="post" action="options.php">
<?php settings_fields('custom-status-group'); ?>
<?php do_settings_sections('custom-status-group'); ?>
<table class="form-table">
<tr valign="top">
<th scope="row">当前状态</th>
<td style="display: flex; gap: 10px; align-items: center;">
<!-- 原有下拉框 -->
<select name="current_status" id="current_status" style="padding:5px;min-width:200px;">
<option value="">-- 选择状态 --</option>
<?php
$current = get_option('current_status');
foreach($statuses as $status) {
// 下拉框默认选中状态(排除手动输入的情况)
$is_custom = !in_array($current, $statuses);
$selected = (!$is_custom && $current == $status) ? 'selected' : '';
echo "<option value='$status' $selected>$status</option>";
}
?>
</select>
<!-- 新增手动输入框 -->
<input
type="text"
name="custom_status_input"
id="custom_status_input"
placeholder="或手动输入状态"
style="padding:5px;min-width:100px;"
value="<?php
// 回显手动输入的值(如果是自定义状态)
$current = get_option('current_status');
echo !in_array($current, $statuses) ? esc_attr($current) : '';
?>"
>
</td>
</tr>
<tr valign="top">
<th scope="row">文字颜色</th>
<td>
<select name="status_text_color" id="status_text_color" style="padding:5px;min-width:200px;">
<?php
$current_text_color = get_option('status_text_color', '#ffffff');
foreach($color_presets['text'] as $value => $label) {
$selected = ($current_text_color == $value) ? 'selected' : '';
echo "<option value='$value' $selected style='color: $value;'>$label</option>";
}
?>
</select>
</td>
</tr>
<tr valign="top">
<th scope="row">背景颜色</th>
<td>
<select name="status_bg_color" id="status_bg_color" style="padding:5px;min-width:200px;">
<?php
$current_bg_color = get_option('status_bg_color', '#8d9deb');
foreach($color_presets['bg'] as $value => $label) {
$selected = ($current_bg_color == $value) ? 'selected' : '';
echo "<option value='$value' $selected style='background-color: $value; color: white;'>$label</option>";
}
?>
</select>
</td>
</tr>
</table>
<?php submit_button(); ?>
</form>
</div>
<?php
}
// 为后台状态配置页面添加自定义CSS
function custom_status_admin_css() {
// 只在状态配置页面加载该CSS
global $pagenow;
if ($pagenow == 'admin.php' && isset($_GET['page']) && $_GET['page'] == 'custom-status-settings') {
?>
<style type="text/tailwindcss">
@layer utilities {
.status-color-option {
@apply relative pl-8 text-black;
}
.status-color-option::before {
@apply absolute left-2 top-1/2 -translate-y-1/2 w-4 h-4 rounded border border-gray-200;
}
}
</style>
<style type="text/css">
/* 颜色选项显示优化 */
#status_text_color option,
#status_bg_color option {
@apply status-color-option;
}
/* 文本颜色选项的文字和背景 */
#status_text_color option[value="#FFFFFF"] { background-color: #6B7280 !important; color: #FFFFFF !important; }
#status_text_color option[value="#D1D5DB"] { color: #D1D5DB !important; }
#status_text_color option[value="#9CA3AF"] { color: #9CA3AF !important; }
#status_text_color option[value="#4B5563"] { color: #4B5563 !important; }
#status_text_color option[value="#000000"] { color: #000000 !important; }
/* 文本颜色选项的颜色块 */
#status_text_color option[value="#FFFFFF"]::before { background-color: #FFFFFF; }
#status_text_color option[value="#D1D5DB"]::before { background-color: #D1D5DB; }
#status_text_color option[value="#9CA3AF"]::before { background-color: #9CA3AF; }
#status_text_color option[value="#4B5563"]::before { background-color: #4B5563; }
#status_text_color option[value="#000000"]::before { background-color: #000000; }
/* 背景颜色选项的颜色块 */
#status_bg_color option[value="#FFF9C4"]::before { background-color: #FFF9C4; }
#status_bg_color option[value="#E8F5E9"]::before { background-color: #E8F5E9; }
#status_bg_color option[value="#FFD6BA"]::before { background-color: #FFD6BA; }
#status_bg_color option[value="#C8E6C9"]::before { background-color: #C8E6C9; }
#status_bg_color option[value="#B3E5FC"]::before { background-color: #B3E5FC; }
#status_bg_color option[value="#E1BEE7"]::before { background-color: #E1BEE7; }
#status_bg_color option[value="#FFCDD2"]::before { background-color: #FFCDD2; }
#status_bg_color option[value="#FFE0B2"]::before { background-color: #FFE0B2; }
#status_bg_color option[value="#F5F5F5"]::before { background-color: #F5F5F5; }
#status_bg_color option[value="#BBDEFB"]::before { background-color: #BBDEFB; }
#status_bg_color option[value="#D7CCC8"]::before { background-color: #D7CCC8; }
#status_bg_color option[value="#F8BBD0"]::before { background-color: #F8BBD0; }
#status_bg_color option[value="#C5CAE9"]::before { background-color: #C5CAE9; }
#status_bg_color option[value="#9FA8DA"]::before { background-color: #9FA8DA; }
#status_bg_color option[value="#CE93D8"]::before { background-color: #CE93D8; }
#status_bg_color option[value="#A1887F"]::before { background-color: #A1887F; }
#status_bg_color option[value="#EF9A9A"]::before { background-color: #EF9A9A; }
#status_bg_color option[value="#7986CB"]::before { background-color: #7986CB; }
#status_bg_color option[value="#5C6BC0"]::before { background-color: #5C6BC0; }
#status_bg_color option[value="#616161"]::before { background-color: #616161; }
</style>
<?php
}
}
add_action('admin_head', 'custom_status_admin_css');
// ------------------------------------------------ 状态end ------------------------------------------------三、编辑sidebar.php文件
打开博客后台 > 外观 > 主题文件编辑器 > 编辑sidebar.php,找到你头像的位置,新增如下配置,并更新文件:
位置确定技巧:如果点击你的头像能跳转你的“关于我”的页面,那么你复制“关于我”的网址,搜索这个文件,就能确定:
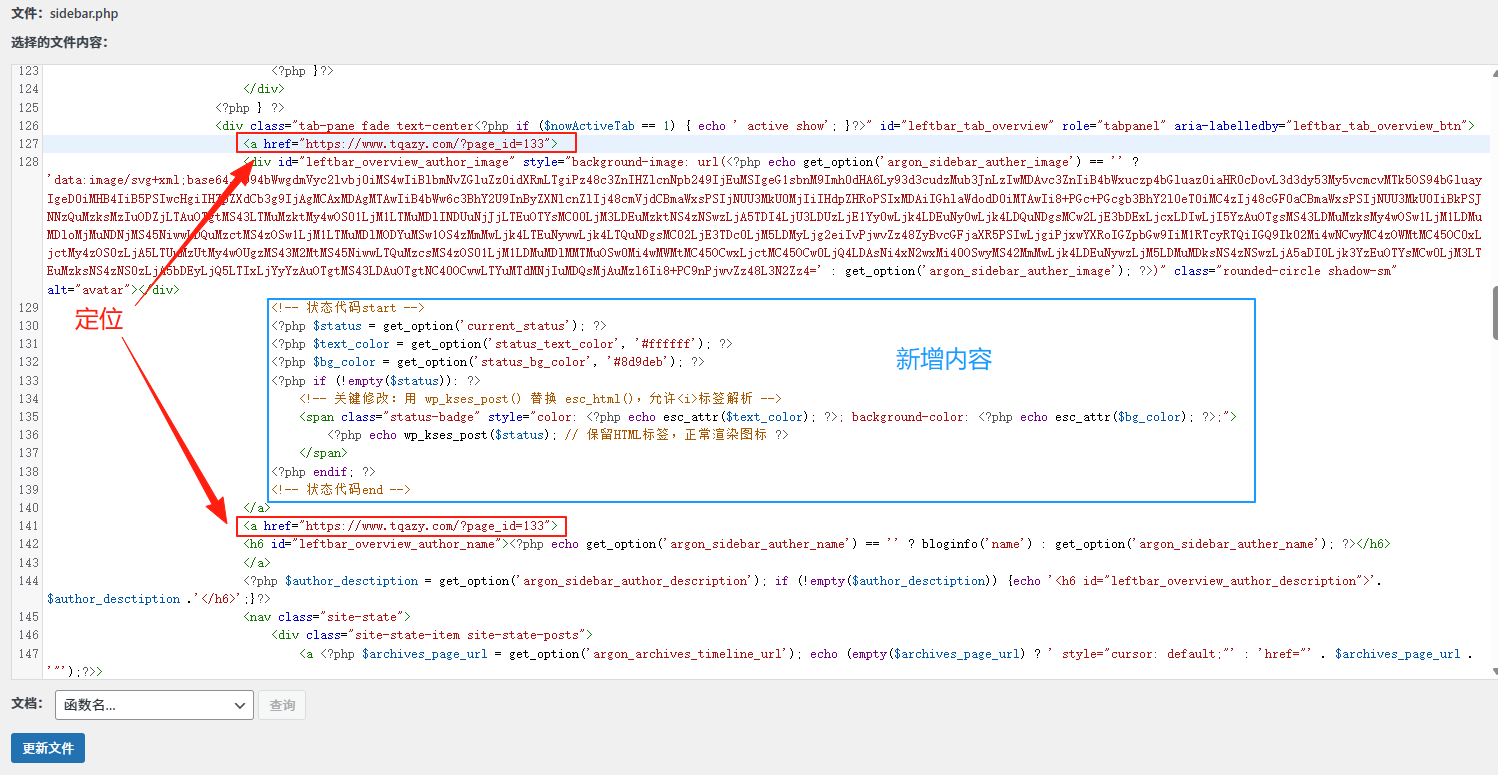
<!-- 状态代码start -->
                                <?php $status = get_option('current_status'); ?>
                                <?php $text_color = get_option('status_text_color', '#ffffff'); ?>
                                <?php $bg_color = get_option('status_bg_color', '#8d9deb'); ?>
                                <?php if (!empty($status)): ?>
                                    <!-- 关键修改:用 wp_kses_post() 替换 esc_html(),允许<i>标签解析 -->
                                    <span class="status-badge" style="color: <?php echo esc_attr($text_color); ?>; background-color: <?php echo esc_attr($bg_color); ?>;">
                                        <?php echo wp_kses_post($status); // 保留HTML标签,正常渲染图标 ?>
                                    </span>
                                <?php endif; ?>
                                <!-- 状态代码end -->
四、新增自定义CSS样式
打开博客后台 > 外观 > 自定义 > 额外CSS > 拉到最后新增如下内容并发布:
/* 状态代码start */
.profile-avatar {
    position: relative;
    display: inline-block;
}

.status-badge {
    position: absolute;
    left: calc(100% - 90px);
    top: 63px;
    font-size: 12px;
    padding: 2px 8px;
    border-radius: 12px;
    box-shadow: 0 2px 4px rgba(0,0,0,0.1);
    white-space: nowrap;
    text-align: left;
}

/* 状态代码end */这个left和top部分,可以根据“状态”标签的实际位置进行适当调整。
五、开始分享个人状态
上面配置好之后,刷新后台,会增加一个菜单:
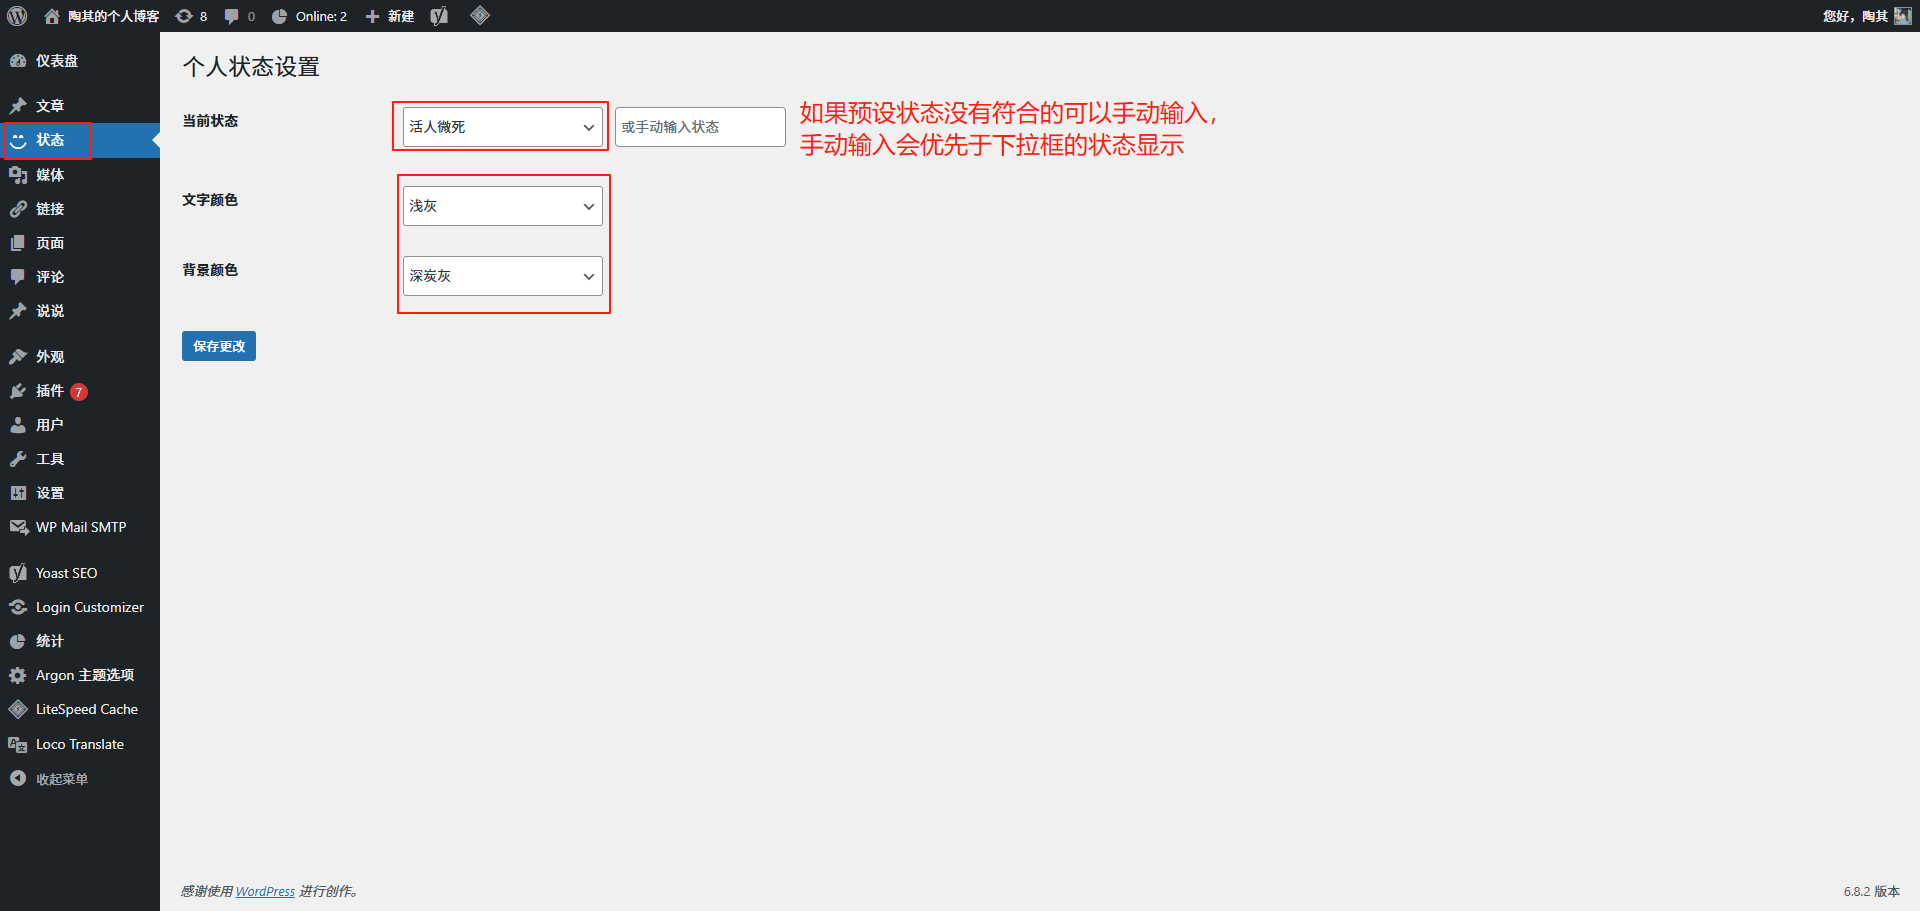
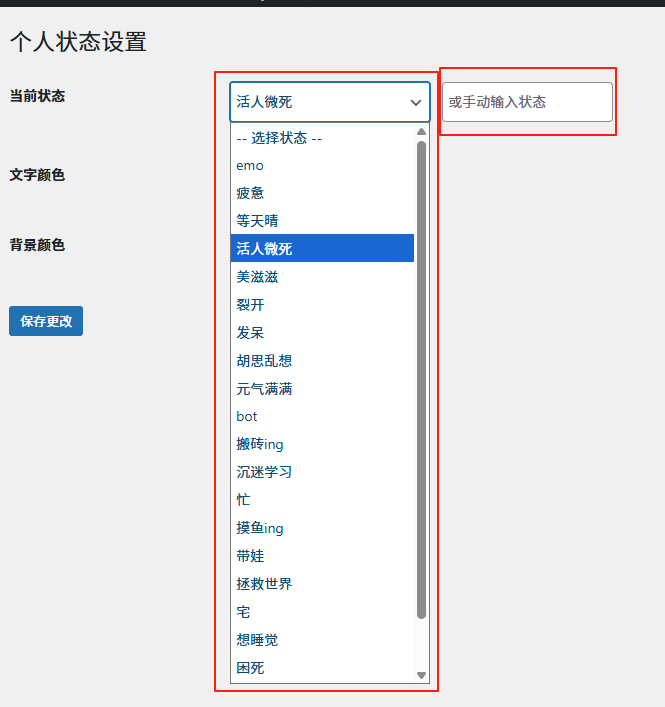
选择好之后,保存更改。
前端页面就能显示:
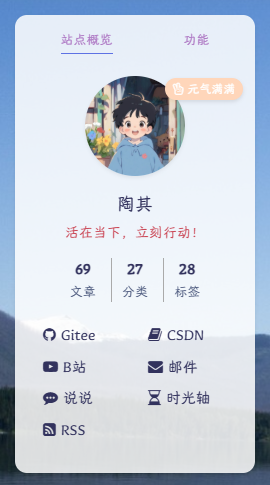
预设的状态带有图标,输入的状态没有图标。
如果您想更换其他状态或者颜色,可以修改上面在functions.php的代码。


又是一个纯自用功能,文字后面可以加点emoji表情,更生动一点
这啥情况,这个安卓图标咋这么大,就这样的嘛,附个图片链接
https://wmimg.com/i/433/2025/08/688d5b5618ec8.jpg
不清楚,我的手机浏览器查看没有这种变大的情况
预设的状态,前面是有图标。